本文最后更新于:10 个月前
今天教大家配置一个IDEA的环境,以及如何新建一个工程,废话不多说,搞起来
1.下载IDEA 这里推荐一个微信公众号软件安装管家,关注后给它发送软件名,像下面这样:
选择一个最新的版本,最好是英文版
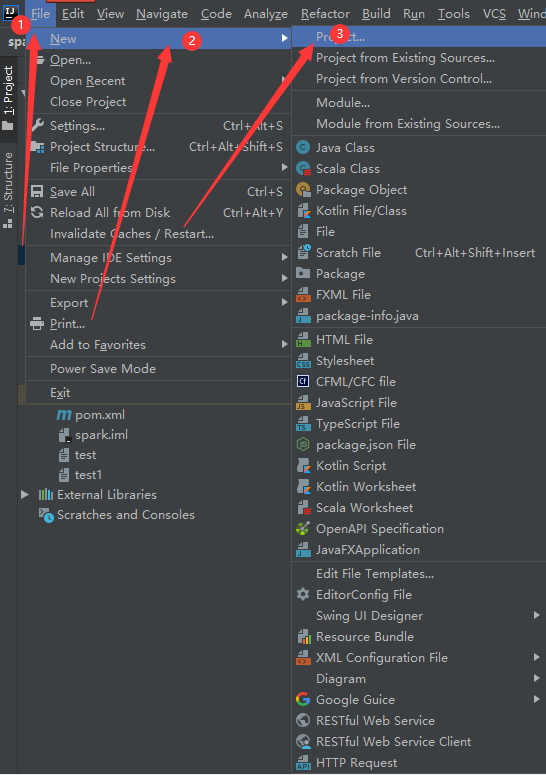
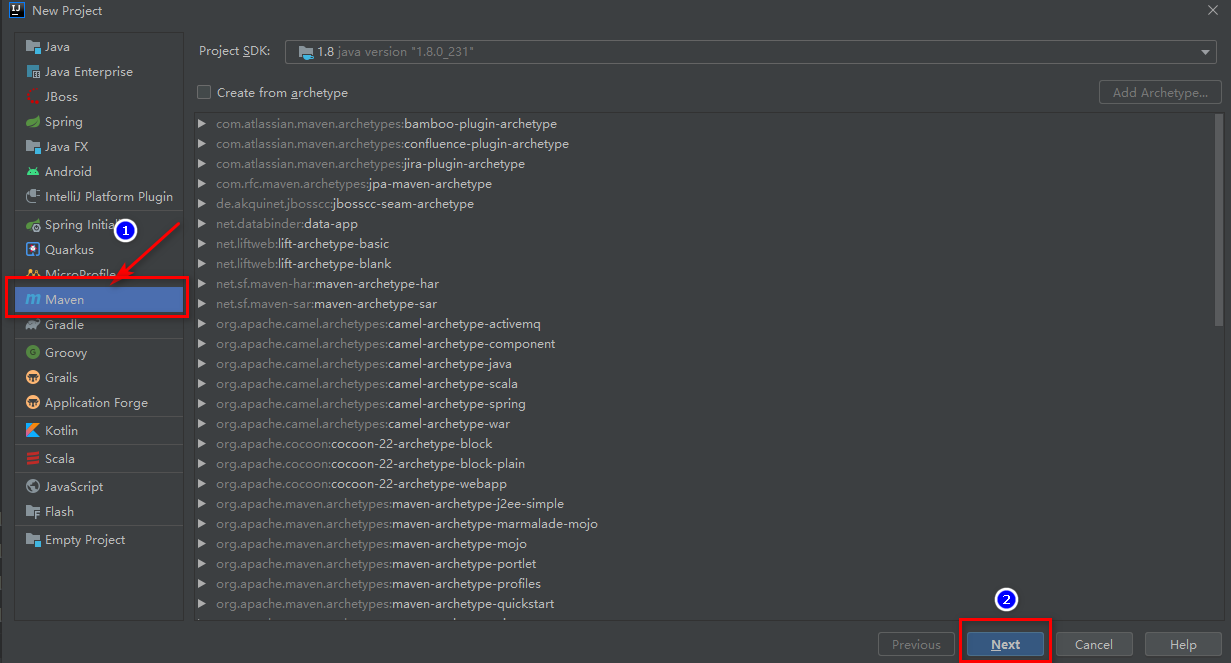
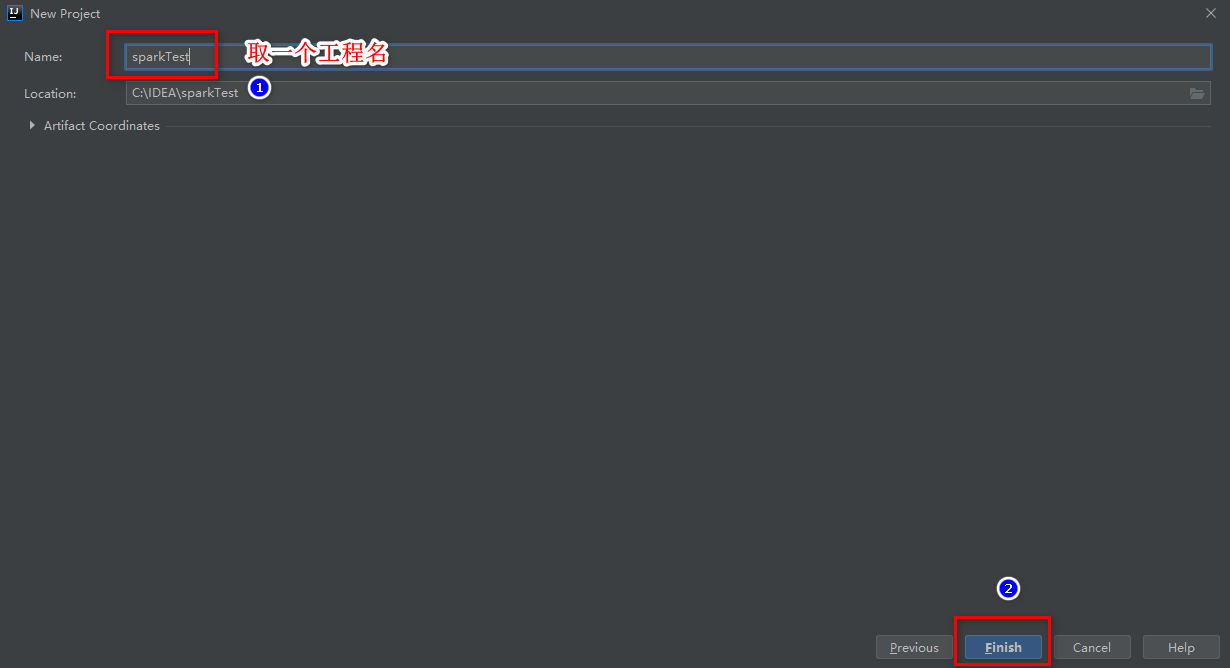
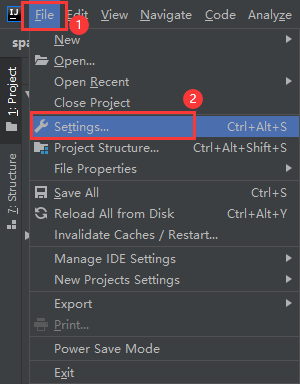
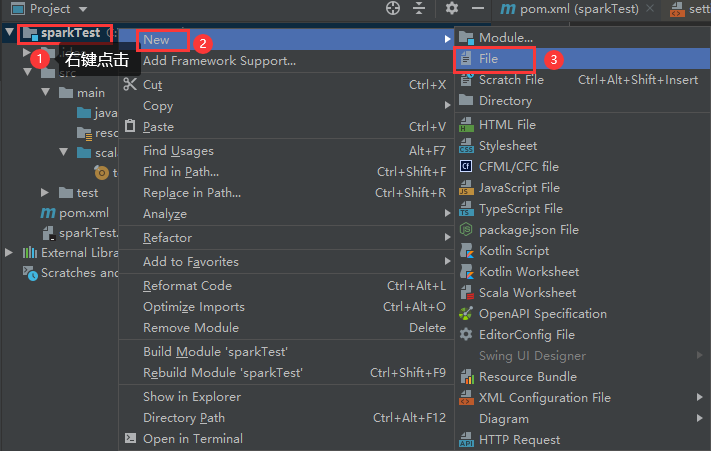
2.新建工程
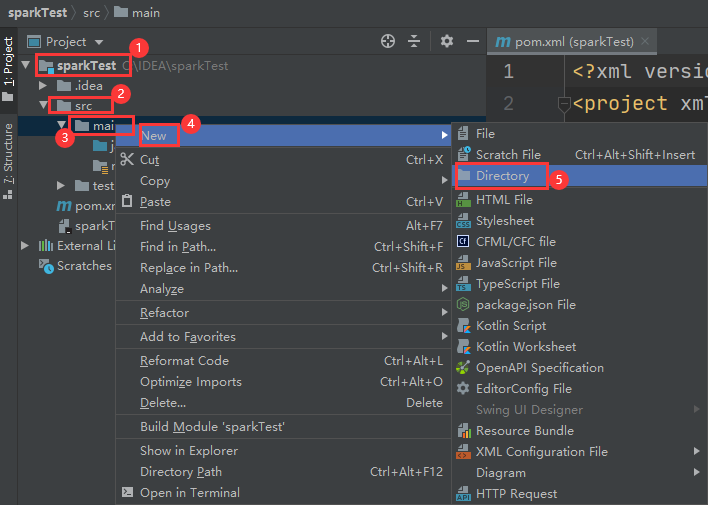
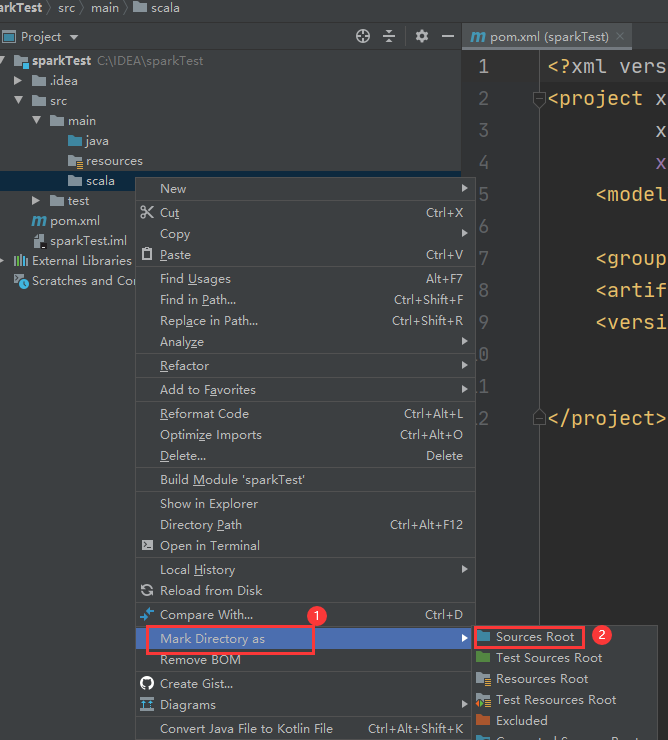
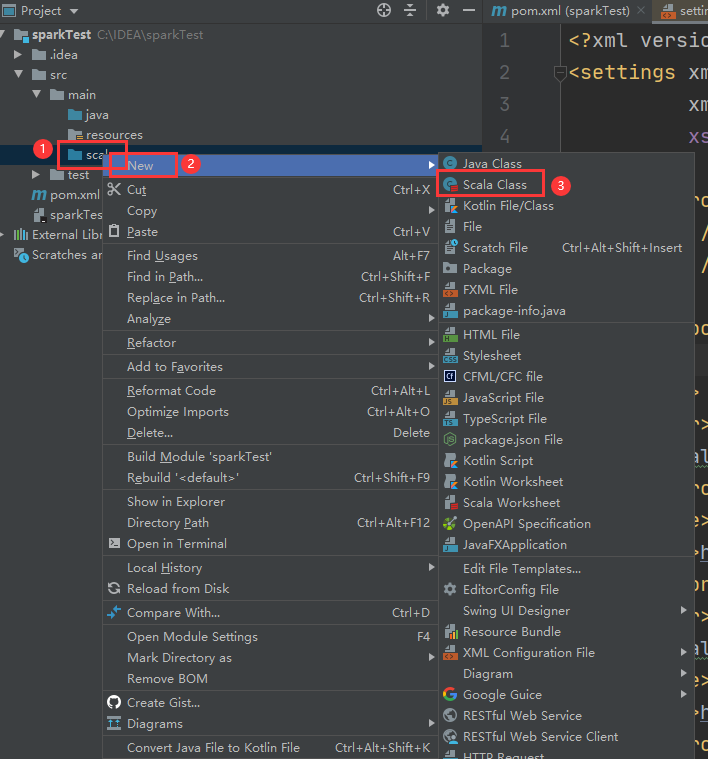
3.添加scala文件夹
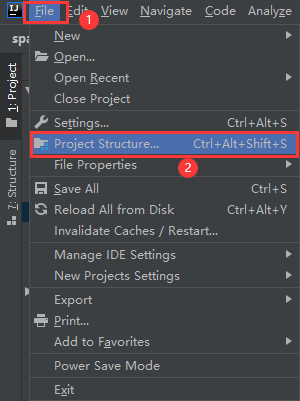
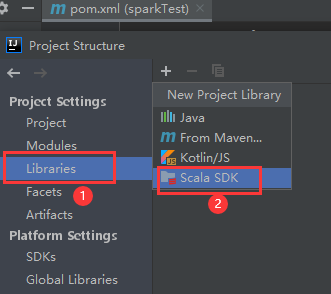
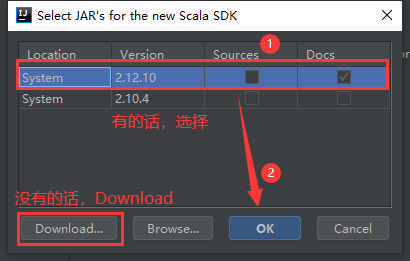
4.添加scala SDK ps:为了版本匹配,不是对工程很了解的同学尽量下载2.10.4 2.12.10,后面我添加的依赖都是这个版本
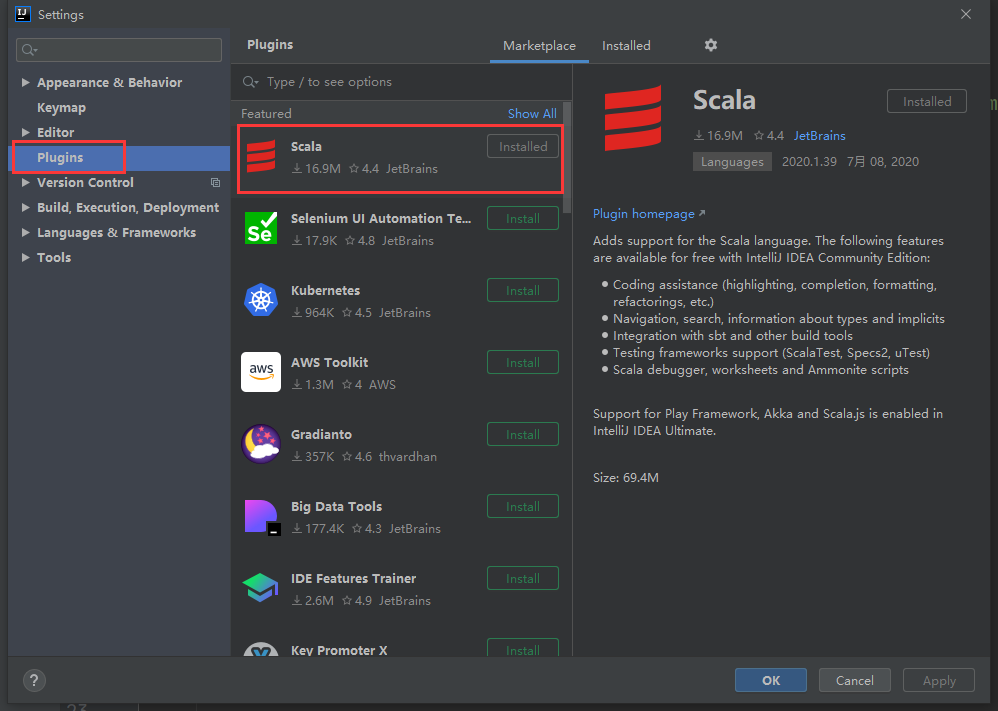
如果没有这个选项的话,要先安装Scala插件
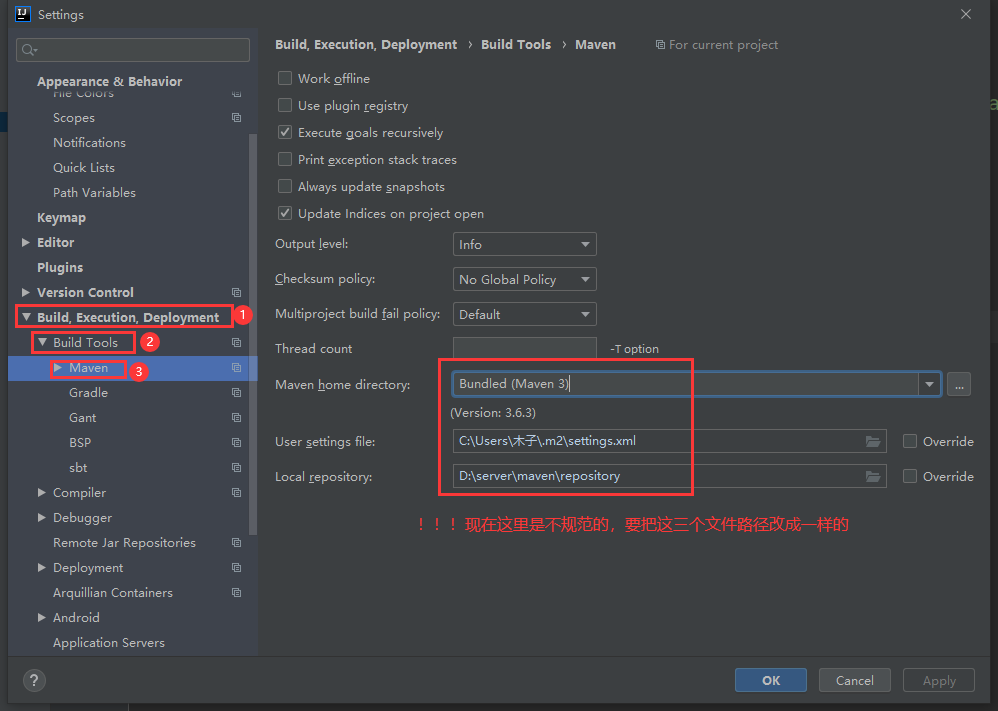
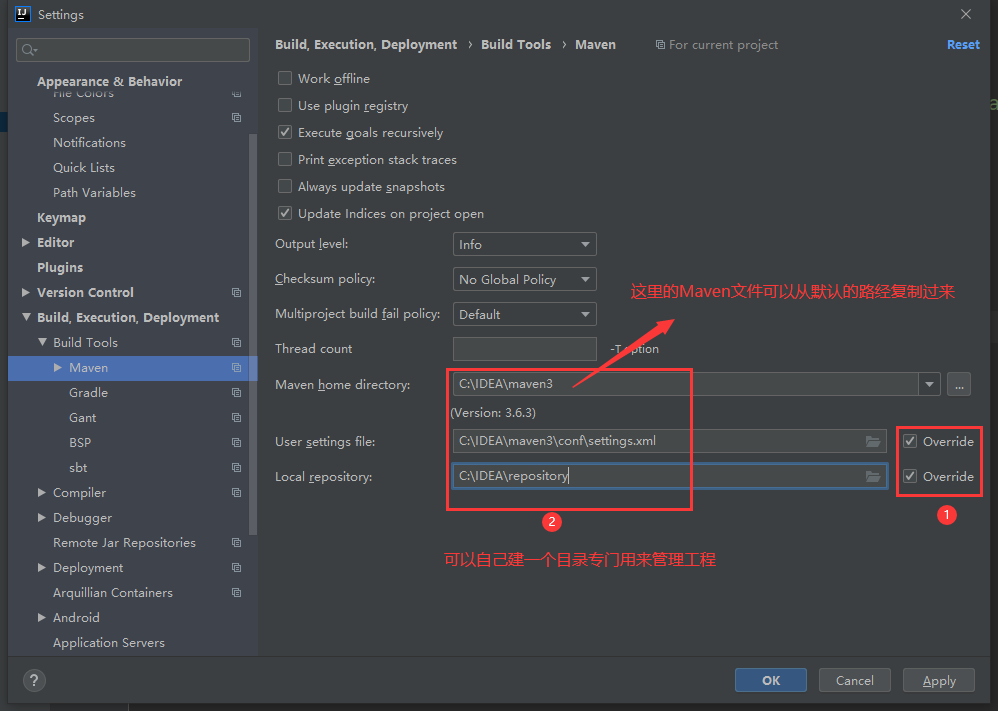
5.修改工程目录
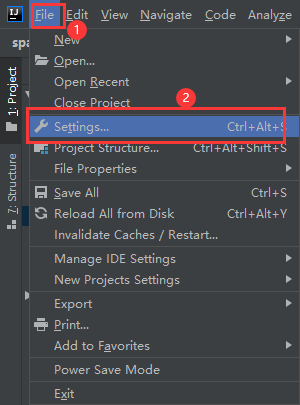
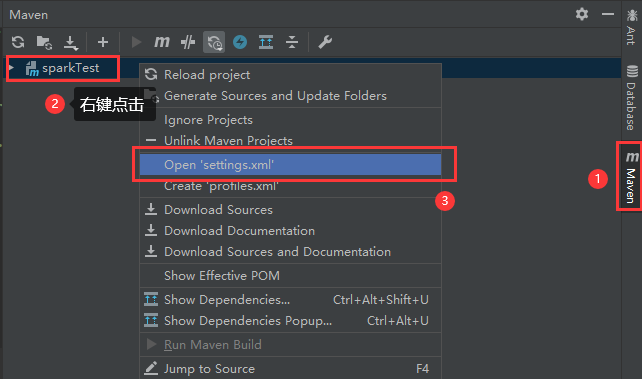
6.设置settings.xml文件 ps:有些同学是 Create ‘settings.xml’
把你原先的settings.xml的内容删掉,替换成下面这段
1
2
3
4
5
6
7
8
9
10
11
12
13
14
15
16
17
18
19
20
21
22
23
24
25
26
27
28
29
30
31
32
33
34
35
36
37
38
39
40
41
42
43
44
45
46
47
48
49
50
51
52
53
54
55
56
57
58
59
60
61
62
63
64
<?xml version="1.0" encoding="UTF-8"?> <settings xmlns ="http://maven.apache.org/SETTINGS/1.0.0" xmlns:xsi ="http://www.w3.org/2001/XMLSchema-instance" xsi:schemaLocation ="http://maven.apache.org/SETTINGS/1.0.0 http://maven.apache.org/xsd/settings-1.0.0.xsd" > <pluginGroups /> <proxies /> <servers /> <localRepository > D:/server/maven/repository</localRepository > <mirrors > <mirror > <id > alimaven</id > <mirrorOf > central</mirrorOf > <name > aliyun maven</name > <url > http://maven.aliyun.com/nexus/content/repositories/central/</url > </mirror > <mirror > <id > alimaven</id > <name > aliyun maven</name > <url > http://maven.aliyun.com/nexus/content/groups/public/</url > <mirrorOf > central</mirrorOf > </mirror > <mirror > <id > central</id > <name > Maven Repository Switchboard</name > <url > http://repo1.maven.org/maven2/</url > <mirrorOf > central</mirrorOf > </mirror > <mirror > <id > repo2</id > <mirrorOf > central</mirrorOf > <name > Human Readable Name for this Mirror.</name > <url > http://repo2.maven.org/maven2/</url > </mirror > <mirror > <id > ibiblio</id > <mirrorOf > central</mirrorOf > <name > Human Readable Name for this Mirror.</name > <url > http://mirrors.ibiblio.org/pub/mirrors/maven2/</url > </mirror > <mirror > <id > jboss-public-repository-group</id > <mirrorOf > central</mirrorOf > <name > JBoss Public Repository Group</name > <url > http://repository.jboss.org/nexus/content/groups/public</url > </mirror > <mirror > <id > google-maven-central</id > <name > Google Maven Central</name > <url > https://maven-central.storage.googleapis.com</url > <mirrorOf > central</mirrorOf > </mirror > <mirror > <id > maven.net.cn</id > <name > oneof the central mirrors in china</name > <url > http://maven.net.cn/content/groups/public/</url > <mirrorOf > central</mirrorOf > </mirror > </mirrors > </settings >
7.设置pom.xml文件 在</project>前面添加下面这段:
1 2 3 4 5 6 7 8 9 10 11 12 13 14 15 16 17 18 19 20 21 22 23 24 25 26 27 28 29 30 31 32 33 34 35 36 37 38 <dependencies > <dependency > <groupId > org.scala-lang</groupId > <artifactId > scala-library</artifactId > <version > 2.12.10</version > </dependency > <dependency > <groupId > org.apache.spark</groupId > <artifactId > spark-core_2.12</artifactId > <version > 3.0.0</version > </dependency > <dependency > <groupId > org.apache.spark</groupId > <artifactId > spark-sql_2.12</artifactId > <version > 3.0.0</version > </dependency > <dependency > <groupId > org.scalanlp</groupId > <artifactId > breeze_2.12</artifactId > <version > 1.0</version > </dependency > <dependency > <groupId > org.scalanlp</groupId > <artifactId > breeze-viz_2.12</artifactId > <version > 1.0</version > </dependency > <dependency > <groupId > commons-io</groupId > <artifactId > commons-io</artifactId > <version > 2.4</version > </dependency > </dependencies >
添加完点这个按键刷新
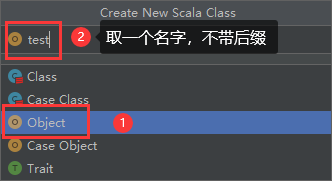
8.新建Scala项目
写一段简单的代码示范一下
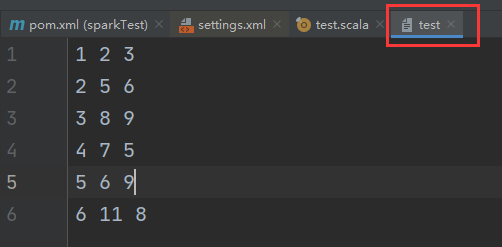
创建一个test文件
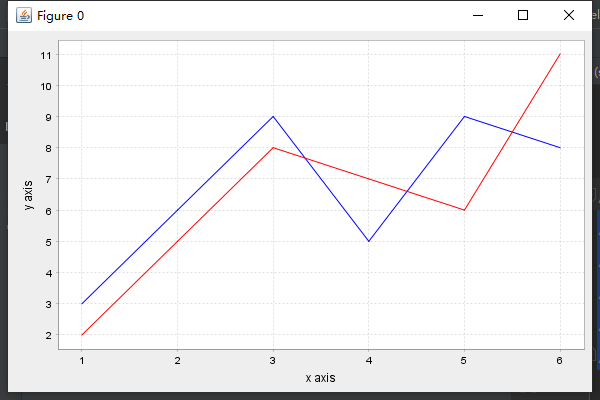
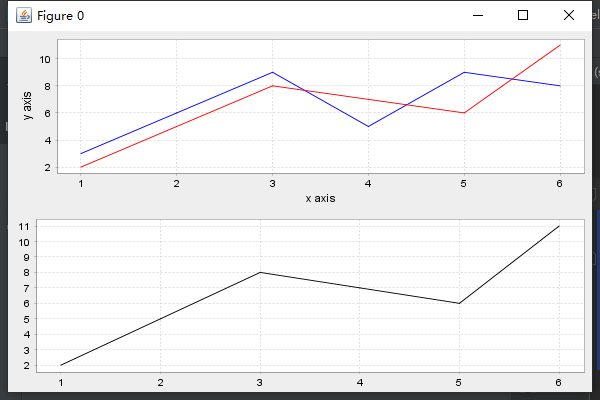
写一段简单的画图代码1 2 3 4 5 6 7 8 9 10 11 12 13 14 15 16 17 18 19 20 21 22 23 24 25 26 27 28 29 30 31 32 33 34 35 36 37 import breeze.plot.{Figure , plot}import org.apache.spark.{SparkConf , SparkContext }object test def main Array [String ]): Unit = {val conf = new SparkConf ().setMaster("local[*]" ).setAppName("test" )val sc = new SparkContext (conf)val rdd1 = sc.textFile("test" )val rdd2 = rdd1.map(_.split(" " ))val rdd3 = rdd2.map(x=>(x(0 ),x(1 ),x(2 )))val x_zhou = rdd3.map(x=>x._1.toDouble).collect()val y1_zhou = rdd3.map(x=>x._2.toDouble).collect()val y2_zhou = rdd3.map(x=>x._3.toDouble).collect()val f = Figure ()val p = f.subplot(0 )"red" )"blue" )"x axis" "y axis" "d:\\test1.png" )val p2 = f.subplot(2 , 1 , 1 )"black" )"d:\\test2.png" )
运行结果图片会自动弹出,同时在D盘下有两个图片文件
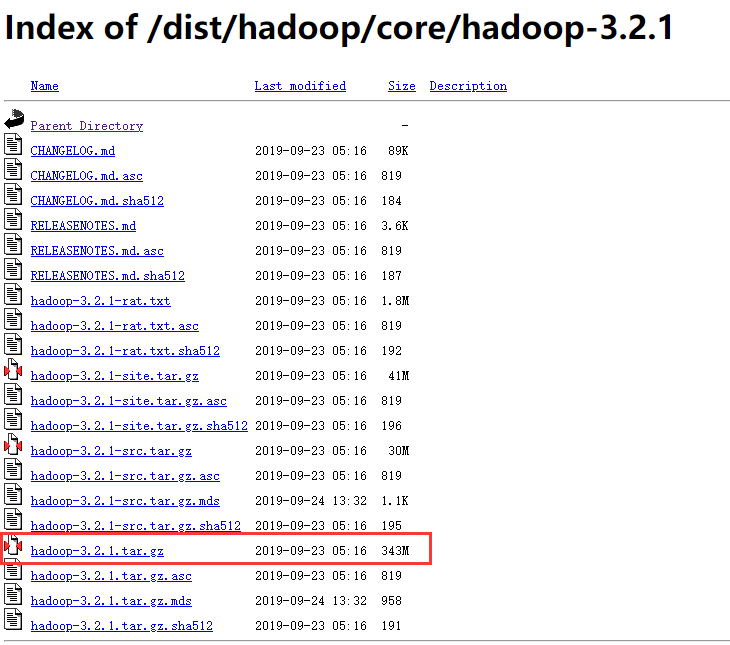
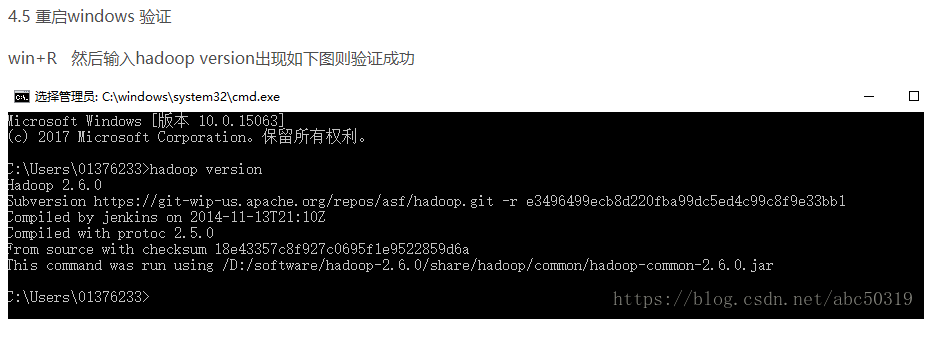
9.常见错误 1.Hadoop报错:Failed to locate the winutils binary in the hadoop binary path
3.将D:\hadoop-3.2.1\bin下的所有文件copy到D:\software\hadoop-3.2.1\bin下
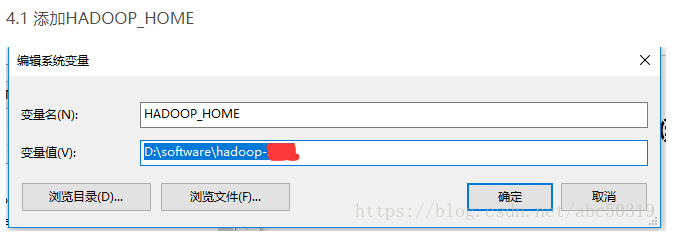
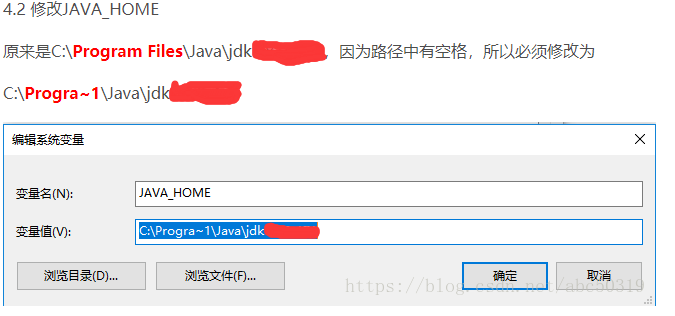
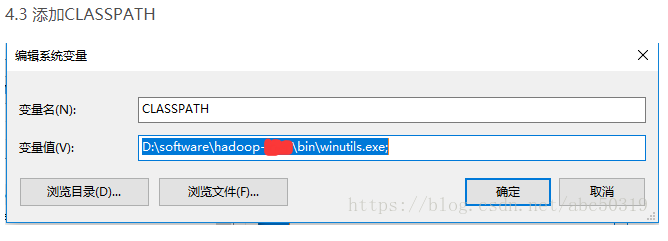
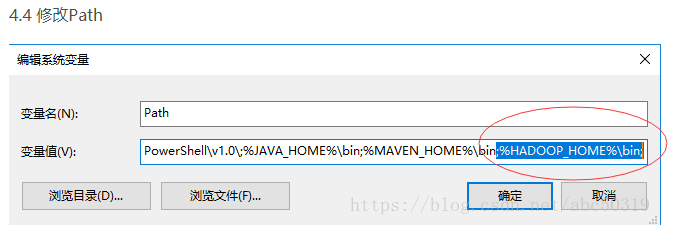
4.配置环境
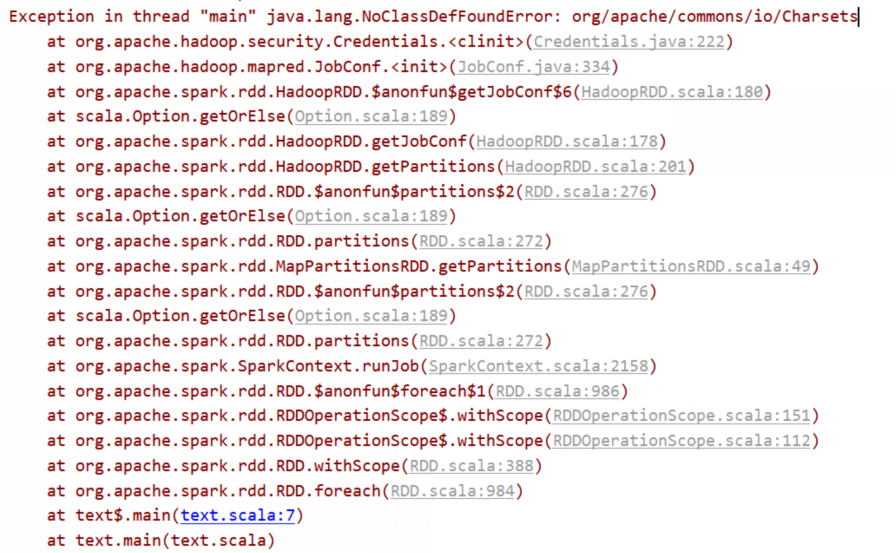
2.NoClassDefFoundError:org/apache/commons/io/Charsets
结尾
IDEA配置完了,大数据写起来!!!


